Adapted from the Shining Force instructions manual, produced and © Sega Enterprises Limited, 1993. No breach of copyright is intended, this document is for personal use only.
In a wondrous land…
…perhaps not so far from our world, a strange and terrible series of events took place. The powers of darkness, led by Dark Dragon, fought for control of the world of Rune. Legendary warriors of light fought them with the ancient and modern weapons of the time, and drove Dark Dragon into another dimension. But Dark Dragon vowed that in 1,000 years, he would be able to break through the inter-dimensional barrier, back into this world.
A thousand years of peace and tranquillity passed. The people of the world were happy to live their lives in contentment, able to spend time rediscovering the magical and technological wonders destroyed by Dark Dragon and using them to benefit all people.
But the kingdom of Runefaust has begun a massive attack of the kingdoms of Rune – intending to help Dark Dragon return to this world! A small band of warriors has been sent out on a dangerous journey to fight against the dark forces of Runefaust, and you are the leader. Prepare yourself for the ultimate battle!
1. Directional Button (D-button)
- Press to highlight options/items
- Press to move characters
- Press to move highlight box
2. Start Button
- Press to skip through Story screens and reach the Title screen.
3. Button A
- Press to see Options boxes and Status windows
- Press to see opponents’ statistics
- Press to speed through messages
4. Button B
- Press to cancel selections
- Press to speed through messages
5. Button C
- Press to see Options boxes and Status windows
- Press to see opponents’ Status windows
- Press to speed through messages
Before the battle begins…
When you turn on your Mega Drive [Genesis], the SEGA logo appears, followed by the Shining Force story screens. Press the Start Button to see the title screen, and press again to meet Simone, who will help you out with the starting options screen. If this is your first time playing, select new, to start the game from the beginning, Start by pressing button A or C, the pick the number of the space where you wish to save the game data by pressing the D-button left or right until it begins to pulse. Press button A or C to go to the Name Select screen.
Now that you’ve set the scene for your adventure, you need a name for yourself. You can input up to eight characters in the Name Select screen. Select a character by moving the red highlight box with the D-button until it’s around the character you wish to choose, and press button A or C to enter the character. If you make a mistake, highlight DEL and press button A or C, or to save time, just press button B to delete characters. When you’re finished, highlight END and press button A or C to start the game.
You can place up to three separate games in the memory RAM. If you already have one or two games saved, you have four choices available to you. You can start a new game, continue a previously saved game, delete a game or copy an existing game to a different space.
If you start a new game, you will only be able to save it in the last empty space. Press button A or C to save the game, Continue a game by pressing the D-button left or right until the game you want to continue pulses and press button A or C. The delete function allows you to make space for a new game by getting rid of an old one. Make sure you don’t delete the wrong one though! Pick the game you wish to delete and press button A or C, Copying games allows you to go ahead with a game while having the option of going back later and retrying if things don’t go well. Pick the game you wish to copy with the D-button and press button A or C to select it. Then select the space you wish to copy it to in the same way.
You can only copy a game if you have space available to save it in. If all the spaces are filled, you have only two options: to continue a game or delete a game. You have to delete a game before you can save one.
The scene is set…
The southern kingdom of Guardiana has long been a bastion of peace and knowledge, as well as the kingdom which guards the Gate of the Ancients – a historic gate to unknown worlds. The oldest books kept in the Royal library are many hundreds of years old, and some tell of a great battle between the forces of Light and Darkness. The Great book of Ancient Lore, one of the oldest books in the world of Rune, says that just before Dark Dragon was thrust into an alternate dimension, he said that he would return in 1,000 years to reclaim Rune as his own!
Most people have forgotten about this ancient prophecy. But the kingdom of Runefaust, once a fair and just kingdom, has begun attacking and taking control of the kingdoms of Rune. The kind of Runefaust, King Ramladu, was once a good man, but it is rumoured that he has slowly been corrupted and twisted by evil Darksol, a great wizard and powerful warrior. And some people say that even Darksol is only the servant of an even greater Dark Force… could the prophecy of Dark Dragon’s return be true?
Your teacher, the warrior Varios, believes this is so and is preparing for an inevitable attack on Guardiana by the army of Runefaust. He thinks that while the enemy is occupied with their attack on Guardiana, a small force of well-trained warriors could make their way out and travel through the kingdoms of Rune, picking up information and freeing those under Runefaust’s grip. The burden of leadership has fallen on your shoulders. You must make your way through the lands with the Shining Force team, stopping enemies wherever you may find them, gaining experience – and picking up new teammates – while you follow the trail to Runefaust to determine the fate of all Rune!
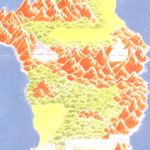
Kingdoms and Towns of Rune
Before and after battles you’ll usually find yourself strolling about the various towns and villages, picking up information, talking to the people who live there and buying items to help you on your journey. When you’re in town, you have certain options available to you. Access these options by pressing button A or C.
- Talk
If your character is standing in front of, behind or next to someone, selecting Talk allows you to listen to what they have to say. - Item
If you want to employ and item on of your characters is carrying, select this. A second set of item options appear on the screen. These options are detailed further down. - Search
Use this to open treasure chests or investigate objects and explore areas that look suspicious. - Magic
This command allows you to use your EGRESS magic spell. See the Spells Section for more information on the magic spells. This command will not work when in non-battle areas.
Item options
These options allow your characters to employ items they’re carrying. Pick an item by placing the highlight box around the name of a character with the D-button. The items that character is carrying are displayed below his or her picture to make it easier to find the item you’re looking for. Once you find it, press button A or C and a small highlight box will appear around one of the items that character is carrying. Move the D-button until the item you wish to select is highlighted and press button A or C. To cancel your selection, press button B.
- Use
You can utilise any item that any of your characters are carrying with this command. More information on items can be found further down. - Equip
Use this command to equip a character with a weapon or replace a weapon a character is equipped with for another one. - Drop
If for some reason you need to discard and item someone is carrying, use this command. - Give
Use this command to give an item to a character. Select the item as above, and select the character you’ll give it to the same way.
Shop options
There are usually two shops in every town – one selling weapons and the other selling various items such as healing herbs. These shops often display a sign outside which has a picture of a bag on it. Step up to the counter, select the Talk option, and the shopkeeper will ask you what you want.
- Buy
When buying, highlight your choice by pressing the D-button left or right, and press button A or C to select it. The shopkeeper will give you the price. Press the D-button to highlight the Yes nodding head or the No shaking head to make a decision. Next, select the character you will receive the item by selecting his or her name and pressing button A or C.
Note: if the character can’t use a weapon the shopkeeper will ask you if you want to buy the item anyway. Don’t buy an item you can’t use unless you’re going to transfer it to another character. - Sell
When selling an item, highlight the character who has the item you want to sell and press button A or C. Next, highlight the item you wish to sell. The shopkeeper will give you a price. If the price is equitable, press the D-button to select the Yes nodding head or the No shaking head. - Repair
If you want an item repaired, highlight the character who has the broken item and press button A or C. Next, select the item with the D-button and press button A or C again. - Deals
If you want to know what the special items on sale are, select this option and if you want to buy something, make your selection of items just as you would for regular items.
Headquarters options
Once you have assembled the Shining Force’s members, they will be waiting for you at Headquarters with your advisor, Nova, ready to go out and join the fight. The following options are available at Headquarters: You can listen to Nova’s advice, utilise an item one of your members is carrying, see your members’ current statistics or change your excursion team’s members. To select an option, highlight it with the D-button and press button A or C.
- Advice
Nova has lots of experience battling the army of Runefaust. Pay close attention to his advice on upcoming battles – it’s certain to be useful. - Item
Your item options here are the same as the standard item options, detailed earlier. - Status
Take a look at the status of any or all of the Shining Force characters. Make sure to write down the status of all your characters and update as you go along. - Join
As you make your way through the lands of Rune, you are bound to meet a number of people who will join your group, and only 12 can take part in the battles at one time! Select this to replace members on the excursion team with others who are “waiting on the sidelines”.
Note: you can only change members when you’re at headquarters.
In the Abbey
In every town you will travel to, you will be able to find the priest, who can help you in a number of ways. The priest can save a record of your adventures up to the current point, raise a character who has been defeated in battle, promote a character who has obtained a certain level of ability (see further down for more information on promotions), or cure a poisoned character. If the priest asks you any questions, answer by pressing the D-button to highlight the Yes nodding head or the No shaking head. Select characters to be promoted by highlighting their name in the character list and pressing button A or C.
Note: raising and curing characters is done in exchange for a donation of money, and the easiest way to avoid this drain on the money bags is to protect your characters well!
Don’t put them in really dangerous situations until you’re sure they’re ready.
- Save
This saves your game exactly as it stands. If you buy items or weapons from shops, don’t forget to equip your characters before you save the game, to save time later. - Raise
If one or some of your characters fall in battle, you can use your Team Leader’s Egress spell to come back to the chapel and restore them to full health. - Promote
Once a character achieves level 10 or higher, you can promote that character, which gives them a number of advantages. - Cure
Some of the creatures in Runefaust’s army can infect your characters with diseases or poisons. Unless your healer has a Detox spell, or someone is carrying special medicines, you’ll need to get that character back to the priest quickly, or you’ll be paying for a raise spell instead of a cure spell!
The battle begins…
Passage through the lands of Rune used to be quiet and pleasant, but the invading army of Runefaust has changed all that. Now, even short distances are fraught with all kinds of danger, from all kinds of beasts. You have sworn to stop Runefaust’s dark army, but it’s going to take all of your courage and skill to do it!
Once you’re out on the battlefield, there are a number of things you must think about. First, what are the enemy’s numbers and strength? You have to check on the locations of all your opponents, as well as find out how strong they are!
Once you have figured out what is waiting for you, and where, you have to think about how to march forward. If your enemies are concentrated to the left, you might want to place your strongest warriors on that flank, with the spellcasters and archers just behind them. If you are near water, with the enemy on the other side, long distance weapons like arrows and spears can do the job without needing to get close enough for hand-to-hand combat.
Combat options
On the field of combat, you will meet up with all kinds of enemies, and you’ll need to use your warriors and resources effectively if you’re to make it through safely.
Each member of the Shining Force has his or her own walking or flying speeds, so you’ll find that some members can outdistance others. Remember though, that your goal won’t be reached with speed, but with careful planning and knowledge of your team’s strong and weak points. Make sure to keep notes on each member of the Shining Force to help figure out your attack strategies and formations.
When the battle starts, your characters will probably be in a group, near one corner of the battle area. Once a character can move (characters move in order, the fastest character first and the slowest character last), his or her Stats window appears at the top right of the screen, and the effect the terrain has on their movement appears in a window at the top left of the screen. The character will be able to move only as far as the flashing ground area extends, and can only move onto a space that isn’t occupied by another character.
Move your character using the D-button. When you have picked the place you want to stop at, press button A or C. If you reconsider and want to move your character again, press button B and move your character to the new position.
Once you decide where your character is to stop, press button A or C to see your Combat options. If your character is close enough to the enemy to attack, the highlighter will appear on the Attack option, and if the enemy is outside the characters striking range, the highlighter will appear on the Stay option. Move the highlighter to the option you want and press button A or C.
- Attack
Pick this option to begin your attack on an opponent (if one is in striking distance). A flashing grid of squares will appear, showing you the character’s striking distance. If more than one enemy is in striking distance, a white highlighter square will appear on a target enemy. Move the square to the enemy you wish to attack and press button A or C. The battle screen will appear next, with your character in the right foreground, and your opponent in the left background. The Stats window for your character will appear above him or her, and the enemy’s Stats window will appear below. The damage your character inflicts on the enemy will show on the enemy’s HP (Hit Points) meter. - Item
If you want to utilise an item one of your characters is carrying, select this. Items options are the same here as described earlier, except that you can only give an item to a character standing next to you. - Stay
This option stops your character wherever he or she is. - Magic
If your character is a spellcaster, select this to cast a spell on a teammate or the enemy. See later on for details about spellcasters.
Special game options
During battle situations, another set of options becomes available. To access these options, press button B at any time it’s one of your characters’ turn to move. A white highlighter box will appear around the character.
- move the box to any character on the battlefield (including enemies) and press button A to see that character’s stats windows.
- press button C to see that character’s full status sheet. This can be very useful when you’re up against an enemy you’ve never seen before. Press button B to return to the character who is supposed to move.
- move the white highlighter box to a place on the battlefield that isn’t occupied by any character and press button A or C to see the Game Command options.
- Map
Select this to see a small map of the entire battlefield, displaying the location of your team (in green) and all enemies (in red). - Message
The option allows you to turn off the battle messages which show the amount of coins and experience you’ve gained in each attack.
note: level-ups and special items are still displayed in messages. - Quit
Select this to quit the game. If you’re sure you want to quit, press the D-button to highlight the Yes nodding head or if you reconsider, highlight the No shaking head and press button A or C.
note: your game will be automatically saved when you use the quit option. - Speed
Change the speed of the text by moving the arrows with the D-button. One is the slowest speed and four is the fastest.
The Shining Force Team
The game starts with you – a young apprentice in Guardiana – being trained by Varios, the best knight in the kingdom. Once you accept the task of defeating Runefaust’s minions, you will be joined by other warriors. What’s more, as you make your way through the now treacherous lands of Rune, you will be joined by others who are also committed to stopping Runefaust’s army.
Listed below are some of the warriors who will join the Shining Force in the quest to defeat Runefaust and bring peace once more to Rune. If you don’t talk to people, you may miss a valuable opportunity to gain new members. You can get other news and information about your quest as well!
Each character has his or her own skills and weaknesses, and it’s up to you as the team leader to get to know your team. Only with them by your side will you be able to defeat the Runefaust evil! It’s time to meet the Shining Force!
The Original Team
1. Shining Force’s Leader
As the leader of the Shining Force, you are an all-round fighter, both fast and accurate. You also know the Egress spell, which whisks you and your group away from danger and back to the last town or kingdom you recorded your adventures in.
Race: Human
Class: Swordsman
Promotion: Hero
2. Luke
A great warrior, Luke is always ready for action. Luke is ver fond of his home in Guardiana, and has sworn that Runefaust shall never hold dominion over his homeland.
Race: Dwarf
Class: Warrior
Promotion: Gladiator
3. Ken
Ken is a powerful warrior, and master of spear-throwing techniques. He likes to be in the front line, where the going is toughest. Make sure he doesn’t get overzealous and get into trouble.
Race: Centaur
Class: Knight
Promotion: Paladin
4. Tao
Although she is young, Tao has studied the magical arts very seriously. She is very brave and a quick learner!
Race: Elf
Class: Mage
Promotion: Wizardess
5. Hans
Hans is a capable archer, and knows all too well the danger Runefaust poses for all of Rune. He’s ready for action, but does get a little nervous if he’s in the front line.
Race: Elf
Class: Archer
Promotion: Bowmaster
6. Lowe
Lowe has been your friend since childhood, and has pledged to protect your life at all costs. He is a great healer, and will try to keep you and the rest of the members of the Shining Force in top condition!
Race: Halfling
Class: Priest
Promotion: Vicar
Other Shining Force Members
1. Gort
This fellow has seen more action than most warriors will ever see. He’s always ready to fight – if it’s for a good cause.
Race: Dwarf
Class: Warrior
Promotion: Gladiator
2. Gong
Gong has fought many battles with Runefaust, so you can be sure that he is an experienced fighter. But the tough exterior hides a kind interior. Remember, Gong is a monk after all!
Race: Half-giant
Class: Monk
Promotion: Master Monk
3. Mae
The only daughter of the great warrior Varios. Mae has trained to be a knight under the best tutor in Guardiana – her father!
Race: Centaur
Class: Knight
Promotion: Paladin
4. Khris
A resident healer of the kingdom of Alterone, Khris has often fought against the Runefaust army. And you’ve given her the chance to defeat the Runefaust evil at its source!
Race: Elf
Class: Priest
Promotion: Vicar
5. Anri
Anri is not only the daughter of the king of Guardiana, she is also the head Mage of Manarina. She has studied magical arts for years and is ready to use them to defeat Runefaust.
Race: Human
Class: Mage
Promotion: Wizardess
6. Arthur
A centaur knight living in Manarina, Arthur has been taking it easy for a while, relaxing and hanging around. But he’s decided that there are more important things than a comfortable bed and a full stomach.
Race: Centaur
Class: Knight
Promotion: Paladin
7. Balbaroy
Balbaroy fought against the Runefaust army until Darksol turned him into stone. If you can rescue him from his predicament, you have found yourself a valuable ally.
Race: Half-falcon
Class: Birdman
Promotion: Sky Warrior
8. Amon
Amon is Balbaroy’s wife, and rescuing him will earn you her gratitude and support as a Shining Force member. Like her husband Balbaroy, Amon is dedicated to stopping the Runefaust evil at all costs!
Race: Half-falcon
Class: Birdman
Promotion: Sky Warrior
9. Diane
Diane is related to the queen of Bustoke, and is a formidable archer. She’s sure to be a useful addition to your team.
Race: Elf
Class: Archer
Promotion: Bowmaster
Weapons
The land of Rune is a fantastic land of magic and advanced technology. Don’t be surprised to see your team battling against the enemy with all manner of weapons, both old and new. Spells and missiles, lances and lasers – all part of the mysterious land of Rune!
Try not to load up your characters fully, as you will start to pick up weapons from foes you defeat in battle – and you can’t pick them up if your hands are full!
Not all weapons can be used by all characters, and some characters can use certain weapons better than others. In addition, some characters can use certain weapons only after they receive promotions. Here is a list of weapons that can be found in Rune, and who can use them. The class that can use that weapon is shown to the right of the weapon in abbreviated form. The “+” listed after the character class abbreviation means that character class can only use that item after being promoted.
note: some of the character classes listed below aren’t in the Shining Force team list. Wonder who they are…?
| Character Class | Abbreviation |
| Swordsman | SDMN |
| Knight | KNTE |
| Warrior | WARR |
| Mage | MAGE |
| Healer | HEAL |
| Monk | MONK |
| Archer | ACHR |
| Birdman | BDMN |
| Werewolf | WRWF |
| Steam Knight | SMKN |
| Wing Knight | WGKN |
| Dragon | DRGN |
| Samurai | SMR |
| Ninja | NINJ |
Swords
| Weapon | User | Attack |
| Short Sword | SDMN,WARR,BDMN | +5 |
| Middle Sword | SDMN,WARR,BDMN | +8 |
| Long Sword | SDMN,BDMN | +12 |
| Steel Sword | SDMN+,BDMN+,NINJ+,SMR+ | +18 |
| Broad Sword | SDMN+,BDMN+,NINJ+,SMR+ | +20 |
| Doom Blade | SDMN+,BDMN+,NINJ+,SMR+ | +25 |
| Katana | SDMN+,BDMN+,NINJ+,SMR+ | +30 |
| Sword of Light | SDMN+ | ? |
| Sword of Darkness | SDMN+,BDMN+ | ? |
| Chaos Breaker | SDMN+ | ? |
Arrows and Launched Weapons
| Weapon | User | Attack |
| Wooden Arrow | ACHR | +8 |
| Steel Arrow | ACHR | +13 |
| Elven Arrow | ACHR+ | +18 |
| Assault Shell | ACHR+ | +27 |
| Buster Shot | ACHR+ | ? |
Spears
| Weapon | User | Attack |
| Wooden Spear | KNTE,SMKN,WGKN | +8 |
| Power Spear | KNTE,SMKN,WGKN | +15 |
| Valkyrie | KNTE+,SMKN+,WGKN+ | ? |
Lances
| Weapon | User | Attack |
| Bronze Lance | KNTE,SMKN,WGKN | +9 |
| Steel Lance | KNTE+,SMKN+,WGKN+ | +18 |
| Chrome Lance | KNTE+,SMKN+,WGKN+ | +22 |
| Halberd | KNTE+,SMKN+,WGKN+ | +25 |
| Devil Lance | KNTE+,SMKN+,WGKN+ | ? |
Axes
| Weapon | User | Attack |
| Hand Axe | WARR | +7 |
| Middle Axe | WARR | +11 |
| Battle Axe | WARR | +16 |
| Heat Axe | WARR+ | +22 |
| Great Axe | WARR+ | +26 |
| Atlas Axe | WARR+ | ? |
Staves and Magical Weapons
| Weapon | User | Attack |
| Wooden Staff | HEAL,MAGE | +4 |
| Power Staff | HEAL,MAGE | +12 |
| Guardian Staff | HEAL+,MAGE+ | +18 |
| Holy Staff | HEAL+ | +26 |
| Demon Rod | MAGE+ | ? |
Items
There are a large number of items which you’ll come across in your journeys, some in treasure chests, some on the battlefield, others is shops in the towns and villages you visit. Each has a special purpose, and you’ll probably find a use for almost all of them. Below is a list of some of the many items to be found in Rune.
1. Medical Herb
This inexpensive item can be bought in any shop in Rune. It restores a certain number of HP to a character when he/she uses it.
2. Antidode
The leaves of this plant dissolve poisons in the blood. With the number of ghouls, zombies and other undead creatures roaming around, you’ll need this item at some point.
3. Healing Seed
More expensive than Medical Herb, these powerful seeds restore a large number of HPs to a character when he/she uses them.
4. Angel Wing
This magic item allows the user to return to the town he or she was last in. Usually the leader of the Shining Force uses the Egress spell to take the group out of danger, but there may be times when this isn’t possible.
5. Rings
Throughout the game you will run across rings with various uses. Let various characters try them on to see what their effects are.
Spells
The magic of Rune is ancient and powerful. Mages and healers throughout the land practice their craft with great devotion. Spellcasters gain experience by applying what they know, and once they become powerful they are very useful indeed.
At the start of your journey, your spellcasters only know spells that can hit one opponent at a time, but as their abilities improve, they’ll be able to blast a number of opponents with one spell! Below is a list of the spells each type of spellcaster can use:
Main Character Spells List
Egress: This spells transports the team back to the last place the game was saved at – usually an abbey.
Mage Spells List
Blaze: A hail of fire rains down on the opponent(s), This spell is particularly useful against the undead.
Freeze: This spell creates a whirlwind of ice in the air around the opponent(s), bringing the temperature in that area down to incredibly low levels.
Bolt: Energy is channelled from the earth and through the spellcaster, who acts as a rod. The energy is then released as electricity, causing the enemy great damage.
Muddle: Creates a mysterious wall of fog around the opponent.
Desoul: This spell invokes one of the Ancient Gods of Death to come and pull the soul from the opponent. This dark spell can only be attempted by the highest level of spellcaster, as the thought of the spell backfiring is too much for the weak-of-heart.
Shield: Protects the recipients from the effects of the opponent’s spells.
Boost: This spell increases the recipient’s attack power.
Sleep: This spell lulls your opponent(s) into a sound sleep, rendering them immobile until they wake up – if they wake up.
Priest Spells List
Heal: The Heal spell restores some of a character’s HPs. Carrying around restorative potions and herbs is fine, but if you’re out in the open for a long period of time, you’re bound to run out eventually…
Detox: Any character who has been poisoned by an enemy can be cured by this spell.
Aura: This powerful heal spell restores HPs to all characters within the caster’s zone of influence.
Dispell: More like a spell mirror, this defensive spell reflects any spell cast by the enemy back to them. Used at the right times, this spell can be devastating against powerful spellcasting enemies.
Quick: This spell increases the speed of your team.
Slow: This spell slows you enemies down considerably, given your team more time to attack.
Monks Spells List
Gong can use Heal and Aura spells.
Special Characters Spells List
Arthur: Although he was trained as a knight, Arthur grew up in Manarina, the famed Kingdom where great wizards and magic-users go to study and improve their spellcasting skills. Naturally, Arthur took the opportunity to lean a spell or two while he was there. Arthur can use Blaze, Freeze and Bolt spells.
Domingo: This very special magical being can use any mage spell except Shield, Blaze and Bolt.
Hanzou: Trained in the Ninja arts (which naturally include spellcasting), Hanzou can use Sleep, Shield, Desoul and Dispel.
Retreat/Defeat
As the leader of the Shining Force, you are the most valuable member. You have all the qualities that a good leader should have: bravery, strength and most importantly, wisdom. Make sure you live up to this by not getting into dangerous situations without support. If you plan to make it through the dangers, you must make sure not to fall in battle. Once the Main Character is defeated, the team is automatically returned to the last place the game was saved at, minus half their gold.
If you’re in trouble, use your character’s Egress spell to retreat safely, or make sure some other members of the Shining Force are carrying Angel Wings to bring you all back to the abbey, where you can save the game up to that point.
Once you’ve reached an abbey or a safe area (such as a town), your characters’ HPs as Magic Points will be completely restored. On the other hand, characters that haven’t been cured remain poisoned or cursed, and characters that haven’t been raised won’t be present in the next battle. Make sure to get to an abbey, Raise all the characters that have been defeated, and Cure all the characters who’ve been poisoned or cursed. If you need supplies, make sure you buy them first. Now you can quit the game if you want to, and when you continue your adventures later, you’ll be able to jump right into the action!
Final advice from Nova
- Bear the following in mind: all members have their own strengths and weaknesses, such as moving slowly or fighting well against certain types of opponents. Keep your group fairly close together to avoid having anyone singled out and surrounded. Also, try to keep your leader and weaker members of the group protected as much as possible and make sure you have thought out your battle plan ahead of time to avoid costly mistakes.
- Jumping into battle recklessly is not the mark of a great leader. To defeat the Runefaust minions, you must first know what they can do. Use the Special Game option described earlier to look at the enemies’ stats sheets and find out where the enemy’s strongest warriors are. Then decide how you’re going to attack based on this information.
- As you know, Rune is a magnificent land, filled with hills, mountains, valleys and rivers. Your enemies will try to use the different terrains to their advantage. Since you are as often on the offensive as you are on the defensive, you must think about how to position your troops to the greatest advantage.
- Promotions: The first time any member reaches level 10, that member an be promoted to a new fighting class. Once that character has been promoted, you’ll be surprised at his or her increases in HP, Speed and Attack strength. What’s more, that character will be able to use more advanced and stronger weapons than before. On the other hand, the character begins their new class with slightly decreased statistics. The trick is to spread your promotions out to avoid having all your characters’ characteristics (like HP and Attack Strength) from dropping at the same time. Keep a few members of your team (such as knights and archers) in reserve and promote spellcasters and the main character as early as possible.
- A lot of characters will join you on your mission, each one of which wants to see the Runefaust army vanquished. As the team leader, you know that only 12 warriors can go out in any party, so don’t overlook a member just because he or she is new and don’t keep other members just because you’re used to them. Your team knows as well as you do that only with the best warriors do you stand a chance of defeating the Dark Dragon.
- Be prepared to fight to the finish if there is no escape, but remember that if the main character is defeated, it doesn’t matter if there’s only one monster left or 20 – you’ll have to start back at the beginning of that battle. The moral is that if things look hopeless, a fool keeps fighting and a wise man retreats, rethinks and tries again.